Using Natural Easter Egg Dyes

With all the controversy over food dyes these days, I decided it was time to begin experimenting with natural food dyes.  My first experiment was so successful that I had to end my 6+ month haitus from blogging so I could share.

I participate in the Bountiful Baskets produce co-op.  This past week they offered an additional item for purchase, an egg dye kit.  The kit included: blueberries, chili peppers, beets, carrots, red onions, yellow onions, and strawberries.  The day prior to picking up my basket I recieved a short e-mail with a few hints, along with some links, as to how to turn these colorful fruits and vegetables into beautiful easter eggs.  I did a little additional research, then rolled up my sleeves and got to work. 

The basic idea was to dice, chop, grate, or crush the fruit/veggie then boil in 2-3 cups of water.

I boiled each one for about 20 minutes, then mashed the fruit with a potato masher to get as much color out as possible.  Then boiled a few more minutes adding more water if necessary.  When I was satisfied with the color I strained the juice into a mason jar and added one tablespoon distilled white vinegar for each cup of liquid.  (One suggestion I read said the eggs could be boiled directly in the juice, I tried this and thought that it added more work than it saved.)  I then covered the jars and placed them in the fridge to cool.

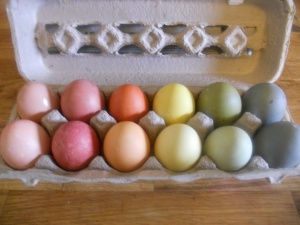
I then placed the boiled eggs into the jars for varying lengths of time.  Below are the formulas that worked best for me.

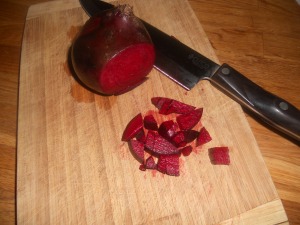
Red/Purple/Pink – Finely dice one large beet.  Boil in 2-3 cups water for 20 minutes.  Mash with a potato masher (the beets wont be soft enough to mash, but go ahead and give them a good stir anyway.  Boil for several more minutes adding more water if necessary. Strain into jar.  Add 2-3 Tbls. vinegar.  The length of time in the dye will make a large difference in the resulting color with this dye.  You can also dilute the dye with water for a softer pink color.  Add additional vinegar if you add a significant amount of water.  I never did get a good red egg.  The best luck I had was to soak an egg in the beet dye for several hours, than in the orange (onion) dye for several hours.  I tried strawberries for a pink dye and was dissapointed with the results, I would rather eat the strawberries.  I tried dried red chili peppers, but got an orange color.  Red onion skins resulted in a color similar to the beet dye.  If you want to try it you can follow the directions below, substituting a red onion. 

Orange –  Peel the skin from one large yellow onion, slice into strips and boil in 2-3 cups water.  Let boil for 20 -30 minutes.  Strain into jar.  Add 2-3 Tbls. vinegar.  It only takes about 20 minutes to get an orange egg, after that it will begin to turn a dark tan color, so check you eggs periodically.

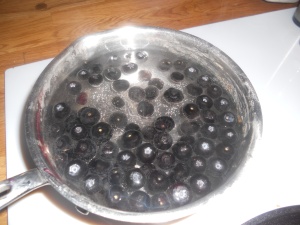
Blue – Boil 1/2 cup of blueberries in 2-3 cups water for 20 minutes.  Mash blueberries with a potato masher.  Boil for several more minutes adding more water if necessary. Strain into jar.  Add 2-3 Tbls. vinegar.  It takes at least an hour to get a nice blue.  The egg will apear a dingy purple color when removed from the water, but will dry to a nice blue.  If it isn’t dark enough when dry, go ahead and put it back in.

Yellow – Grate one large carrot, bring to a boil in 2-3 cups water.  Add 1 tsp. tumeric or cumin, if wanted, to enhance color. Boil for twenty minutes.  Strain into jar.  Add 2-3 Tbls. vinegar.  To get a nice yellow egg it will need to soak for several hours, maybe even overnight.

Green – Soak egg in yellow dye for 2 hours, remove from dye and allow to dry completely.  Place in blue dye for about one hour.  Putting the egg into the blue first will result in a slightly different color.  Experiment with different lengths of time in each color for varying shades of green.  Allow the egg to dry completely.

If you are going to soak an egg in multiple colors allow the egg to dry completely between soakings for best results.  Have fun!

Happy Easter!

I posted this blog over at Kelly the Kitchen Kop’s Real Food Wednesdays and the Nourishing gourmet’s Pennywise Platter Thursday.  Head on over to these great blogs for more real food ideas!

2 Comments

Filed under Holiday

2010 in review

Hmm.  Time to start blogging again.  My goal for 2011 – 52 posts.

The stats helper monkeys at WordPress.com mulled over how this blog did in 2010, and here’s a high level summary of its overall blog health:

Healthy blog!

The Blog-Health-o-Meter™ reads This blog is on fire!.

Crunchy numbers

Featured image

A Boeing 747-400 passenger jet can hold 416 passengers. This blog was viewed about 2,400 times in 2010. That’s about 6 full 747s.

In 2010, there were 20 new posts, not bad for the first year! There were 136 pictures uploaded, taking up a total of 167mb. That’s about 3 pictures per week.

The busiest day of the year was July 1st with 152 views. The most popular post that day was Frozen Yogurt.

Where did they come from?

The top referring sites in 2010 were thenourishinggourmet.com, passionatehomemaking.com, facebook.com, twopeasinabucket.com, and slashingtongue.com.

Some visitors came searching, mostly for http://www.cottonwoodcottagefarm.wordpress.com/, wheatgrass centerpiece, grass, fake wheatgrass centerpiece, and cottage menu planning.

Attractions in 2010

These are the posts and pages that got the most views in 2010.

1

Frozen Yogurt July 2010
2 comments

2

Easter Wheat Grass Centerpiece March 2010
4 comments

3

Soaked Whole Grain Spelt Bread March 2010
3 comments

4

Lentil Curry May 2010
2 comments

5

Quinoa Tabouli May 2010

Leave a comment

Filed under Uncategorized

Frozen Yogurt

It been a busy month!  I have been out of town for several weeks, and came home to an overwhelming amount of work to be done.  Things are starting to settle back into a routine around here and I have been eager to share the latest with all of you.  The garden is overflowing.  We have been enjoying kale, lettuce, bok choy, and spinach.  I got my first tomato last week and my herbs are thriving.  I will make the time to share some of my favorite recipes over the next few weeks as I try to make the most of the abundance from the garden.  We lost several chickens to a hungry family of skunks, but the ones that survived are about ready for butchering.  Expect to see chicken in upcoming recipes.

It has finally gotten hot!  So I had to share this simple recipe for frozen yogurt with you.

Ingredients

3 cups Greek style plain yogurt (or 5 cups plain yogurt)

1/2 – 3/4 cup sugar (or sweetener of your choice)

1 tsp real vanilla

Your favorite toppings!
Directions

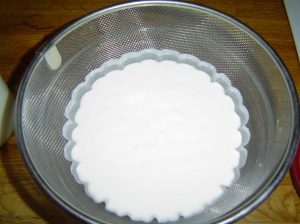
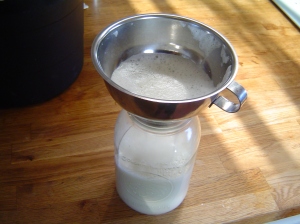
You will need thick yogurt for this recipe so Greek yogurt works perfectly.  You can make your own Greek yogurt by straining plain yogurt through coffee filters or muslin.  I use my own homemade yogurt and strain it in coffee filters set in a strainer over a bowl, in the refrigerator.  It takes me three coffee filters to strain 5 cups, and I get about 2 cups of whey out of the yogurt.  I save the whey, a clear yellowish liquid, for soaking grains.  If I have a lot of whey I will give it to the chickens.  They love it and the protein is good for them.

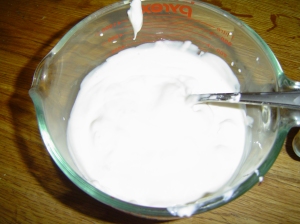
Scoop the yogurt into a bowl.

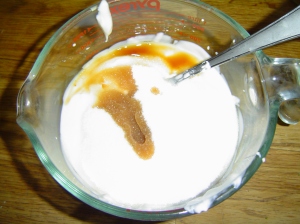
Mix in vanilla and sugar.  Stir well so that the sugar dissolves completely.  If the yogurt isn’t nice and cold, let it sit in the fridge for a bit before placing in the ice cream maker.

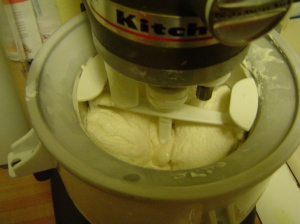
Pour frozen yogurt mixture into your ice cream maker and follow manufacturers directions.   I have the ice cream attachment for my Kitchen Aid stand mixer and I absolutely love it!  It turns out soft serve ice cream in about 25 minutes, and after an hour or two in the freezer has a nice ice cream consistency.  I just store the ice cream bowl in the chest freezer so I can make ice cream anytime I feel like it.

During the last 5 – 10 minutes you can add fruit or other mix-ins, but I prefer to add mine just before serving.  For the kids I add fresh fruit.  My husband likes chocolate chips in his.  My favorite is to add fresh peaches and a tablespoon of Trader Joe’s raspberry wine.  The sweet tangy flavor of the yogurt is nice all by itself too!  Who doesn’t enjoy a dessert that is healthy enough to eat for breakfast?

This post is a part of Pennywise Platter Thursday

4 Comments

Filed under Dairy, Desserts

Lentil Curry

I really enjoy Indian food.  I also love the fact that this dish is so inexpensive.  Lentils served with brown rice make up a complete  protein source, for a fraction of the cost of meat dishes.   When fresh tomatoes are available from the garden the cost is even less.  The following recipe makes about 8 servings, enough for me to freeze half and still have some left over for lunch the following day.  The curry paste that you use will greatly affect the flavor and heat of this dish.  I did not add any curry paste this time because I prefer a milder flavor for the kids.

Ingredients

1 cup uncooked lentils

1 large onion, diced

2 Tbls coconut oil or butter

1-2 Tbls curry paste (opt.)

1 Tbls honey

2-3 cloves garlic, diced

2 Tbls curry powder

1 tsp turmeric

1 tsp cumin

1 tsp ground ginger

1/2 – 1 tsp chili powder

1 tsp salt

4 medium tomatoes, finely diced

1/4 cup water

2 cups brown rice, cooked

Directions

If you are soaking your lentils cover with water and add 1 Tbls whey or lemon juice 6-7 hours before cooking.

Rinse lentils, place in a pot with enough water to cover the lentils and simmer until tender (add more water if necessary).

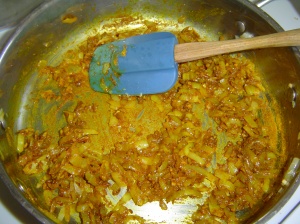
In a large skillet or saucepan, saute the onions in coconut oil or butter.

Combine curry powder, turmeric, cumin, ginger, chili powder and salt in a small bowl.

Add curry paste, honey and garlic to onions.  Add spices and cook for several minutes stirring constantly.

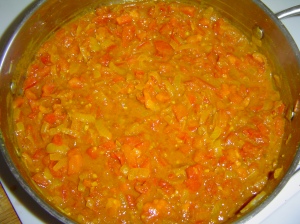
Add tomatoes and water, allow to simmer until tomatoes are soft (or use a can of crushed tomatoes and omit the water).  When fresh eggplant is available from your garden or local farmers market you could also add 1-2 cups of diced eggplant.

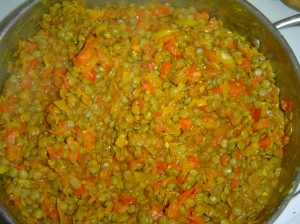
Stir in lentils.

Serve with rice.

This post is part of Pennywise Platter Thursday

3 Comments

Filed under Double Up Dinners, Gluten Free, Vegetarian

Quinoa Tabouli

Tabouli is one of my favorite foods.  Recently I came across a recipe for Tabouli that called for quinoa instead of bulgur wheat.  Since I have been trying to cut down on (not eliminate) my family’s gluten intake, I had to try it.  Quinoa is actually a seed, not a grain.  It is  a relative of spinach, beets, and Swiss chard. All of these foods are loaded with nutrients, but quinoa is the only one that can fool you into thinking you’re eating a grain. It is high in protein, minerals, vitamins, and fiber.  It has a light slightly nutty flavor and it makes a very nice pilaf with fresh vegetables.  In Tabouli the other flavors, particularly the lemon, are more distinctive so the flavor is not noticeably different from using bulgur wheat.

Ingredients

1/2 cup uncooked quinoa

1 medium tomato

1/2 english cucumber

3 green onions

1/3 cup lemon juice

3 Tbls olive oil

2 cloves garlic, minced

2 tsp crushed mint

sea salt to taste

Directions

Place quinoa and 1 cup water in a small pot and bring to a boil.  Cover and remove from heat.  Let sit for 15 – 20 minutes.  If you are using bulgar wheat, cook according to the package directions.

Dice tomatoes, cucumbers, and onion.  White onions can be substituted for green onions for a slightly stronger flavor.  If you are using a regular cucumber you will probably want to peel it.  Mix cooked quinoa and diced veggies in a small bowl.

Add lemon juice, olive, oil, garlic, mint and salt.  Mix well.  Refrigerate.

I made up my tabouli in the afternoon while the kids were napping, and at the same time marinated some fish.  Then 30 minutes before dinner I placed the fish in the oven, and served with the tabouli for a fresh, EASY dinner.

This post is part of Pennywise Platter Thursday

1 Comment

Filed under Gluten Free, Salads

How I Render Beef Tallow

I know that we have all been taught that animal fat (saturated fat) is BAD for us, but guess what it is REAL FOOD.  It has not been engineered by food scientists or made in a factory somewhere.  You can render tallow (beef or sheep fat) or lard (pig fat) in your own kitchen.  I’ve seen several different methods for rendering lard or tallow, but this is the one that I use.  I have the butcher package up all of the fat for me when we have our steer butchered and keep it in the freezer till I get tired of it taking up space.  I have never rendered lard before, because we don’t raise pigs, but I understand the method is the same.  Most butchers will give you fat for free if you request it, but I prefer to know what the animal it came from has been fed.  At some point I intend to get pig fat when a friend is having a pig butchered.  Lard is ideal for baking, especially pie crusts!  Never use the shelf stable lard from the grocery store, it has been hydrogenated – eek!  I will use this tallow for making soap (when I get around to it).  Tallow is also excellent for frying (because it has a high smoke point).  I’m not advocating eating fried food every night, but for an occasional treat french fries fried in beef tallow can’t be beat.


I used about five pounds of fat this time.  I try to do this on a day when I can open all the windows because boiling a pot of fat on the stove for several hours doesn’t give the house the greatest odor.

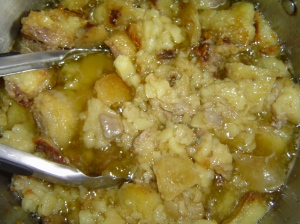
Cut beef fat into small chunks (smaller chunks will cook faster).

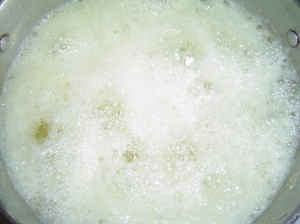
Place in a pot on the stove and heat over medium low heat for 1 – 1 1/2 hours.

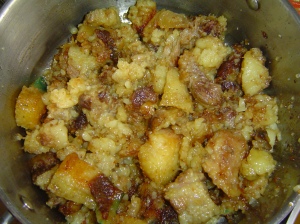
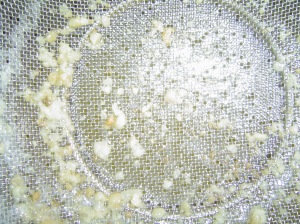
Drain the fat (I use a metal strainer).  Save the solids for the dog.

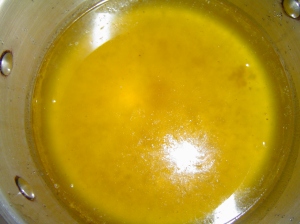
Add twice as much water to the pot, as the amount of liquid fat that you have rendered (I ended up with 4 cups of fat and added 8 cups of water).

Bring fat to a boil and boil for 2 hours.

Strain the fat again to remove any remaining chunks.

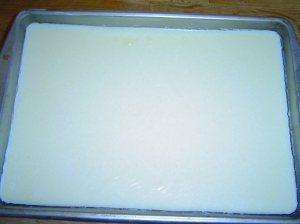
Pour fat  into a 9 x 13 pan.

Refrigerate overnight.

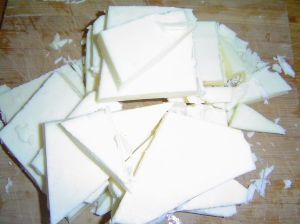
Invert the fat onto a plate over the sink.  The tallow will have risen to the top of the pan and the water underneath will pour off into the sink.  On the underside of the tallow there will be a layer of scum.  Using a butter knife scrape the scum off, until all that you can see is pure white tallow.

Cut the tallow into chunks and refrigerate for up to 4 weeks, or wrap in plastic and freeze.

1 Comment

Filed under Beef

Cottage Flaxjacks -with soaking instructions

The weather has been really lousy this last week.  Between the wind and the cold I’ve hardly ventured out of the house unless it was absolutely necessary.  Being stuck in the house has kind of killed my desire to do much of anything.  Last night I decided it was time to get something done, so I thought I would start Thursday morning with a nice breakfast.  This morning I woke up and saw icicles on the wheel line, and for a minute I thought about getting back in bed.  But, I got up and made pancakes, and now I’m thinking about cleaning the house… maybe.

These pancakes are a favorite at my house.  They are an easy way for beginners to start soaking grains, but even if you forget to soak the flour the night before, they are a great breakfast.

Ingredients

1 cup whole wheat flour (spelt flour works great too!)

1 cup buttermilk

Before going to bed combine flour and buttermilk (if you don’t have buttermilk you can use milk + 2 Tbls yogurt).  Cover and let sit out on the counter overnight.

Ingredients cont.

1/4 cup ground flaxseeds

2 tsp baking powder

1/2 tsp baking soda

1 Tbls sugar

1 egg

1/2 tsp salt

1 Tbls olive oil

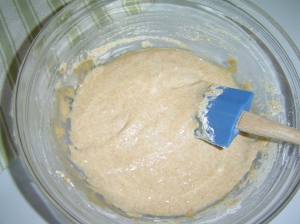
In the morning mix remaining ingredients into the flour and buttermilk.

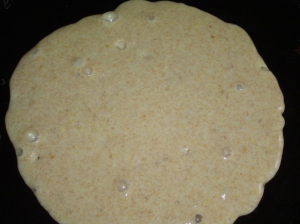
Pour onto a hot griddle (I like cast iron).  Flip when pancake bubbles in the center.

Serve with butter and real maple syrup.  Makes about ten pancakes.

This post is part of Pennywise Platter Thursdays

Leave a comment

Filed under Breakfast

Double Up Dinner – Beef Stroganoff

Several times recently I have been asked how I find the energy to do everything I do.  These days I do feel like I have been working harder than I ever have before.  In addition to my own two children I also babysit a two year old little girl.  It seems like every day we are adding something to our little “farm”, which means more chores every morning and evening.  As I am eliminating processed foods from my family’s diet I am doing more and more cooking and baking from scratch.  At the end of the day I am truly exhausted.  Don’t even think of mentioning that I don’t have a job, I just might start throwing things.  With all of this on my plate I’ve had to work on becoming better organized.  The frozen dinners that had been a lifesaver on nights when I didn’t feel like cooking, are no longer an option now that I have read the list of ingredients in most of them.  So after nearly five years of marriage I have finally begun meal planning.

My basic outline for planning dinners looks something like this:

Monday-Double up from last week (beef)

Tuesday– chicken (double up for next week)

Wednesday-vegetarian

Thursday-beef (double up for next week)

Friday-double up from last week (chicken)

Saturday – other (pork, lamb,vegetarian, dinner out)

Sunday – fish

If I stick to the plan I have two nights that I don’t have to cook.  I do have two nights that I have to put a little work into making a double dinner, but really it doesn’t take much extra effort.  I switch the plan around from week to week and try to make enough so that I can eat leftovers for lunch.  Once a week I try to use the crock-pot.  Serving a double up dinner from the freezer on Monday allows me to get organized so that I can stay on track for the rest of the week.

* Beef Stroganoff *

Ingredients

2 pounds ground beef

1 large onion, diced

1 pound mushrooms, diced

4-6 cloves garlic, finely chopped

2 tsp pepper

2 tsp paprika (opt.)

1 Tbls parsley(opt.)

1 cup water(or beef stock)

2 Tbls flour

8 0z sour cream (I’ve substituted yogurt with good results)

*2 cups brown rice cooked in 4 cups chicken broth

Directions

Cook rice (or if you prefer, noodles)

Brown ground beef in a large skillet, drain fat and set beef aside.

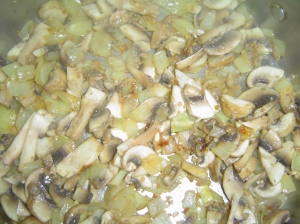
In the same skillet saute onions in some of the reserved fat (our homegrown beef is so lean I often need to use a small amount of butter) , add mushrooms and garlic, and seasonings.  Cook till mushrooms are soft.  Add cooked ground beef.

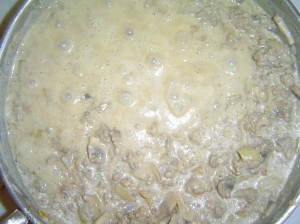
Stir flour into the water to dissolve and pour into skillet.  Simmer, stirring occasionally,  till mixture begins to bubble.  Add sour cream and salt to taste.  Simmer for several more minutes.

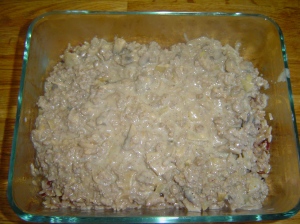
I place half the rice in a glass casserole dish and cover with half of the stroganoff.   My casserole dishes have plastic lids, but you can cover with aluminum foil if yours do not.  I place the dish in the refrigerator for 1 hour, then place in the freezer.  This meal can be reheated in the microwave or the oven.

This isn't the prettiest dinner, but it is nourishing and easy! A favorite with my family.

I serve my stroganoff with a fresh salad, or home canned green beans.  All of my double up dinners make 2 – four serving meals.

This post is a part of Pennywise Platter Thursdays

1 Comment

Filed under Beef, Double Up Dinners, Menu Planning

Gluten Free Chocolate Chip Cookies

My family, thankfully, does not have any food allergies.  I have however, been playing around with gluten-free recipes lately.  A friend of mine has a daughter who is gluten intolerant and I occasionally bake goodies for her.  In return she does my hair, and I’m pretty sure I am getting the better end of the deal.  Last week I made my first attempt at gluten free bread and it was an utter failure.  So today I made something with chocolate in it instead.  My belief is that no matter how bad something is chocolate will make it bearable (that goes for life as well as food).  Well, these cookies were much better than bearable.  I’d even go as far as to say they were amazing.  I didn’t bother to tell my husband that they were gluten-free until after he told me that they were great.  His response was that he had no idea what gluten was but the cookies definitely didn’t need it.  I won’t be giving up bread anytime soon, but these cookies are a keeper.

Ingredients

1/2 cup sugar

1/2 cup brown sugar

1 Tbls milk

1 cup butter

1 2/3 cup rice flour

1 1/3 old fashioned oats

1 tsp baking soda

1 tsp baking powder

1/2 tsp salt

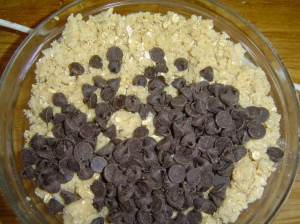
1 cup semi-sweet or dark chocolate chips

Directions

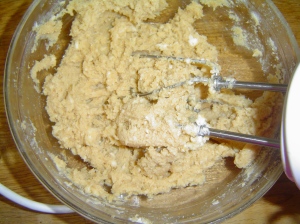
Cream together sugars, butter, vanilla, and milk

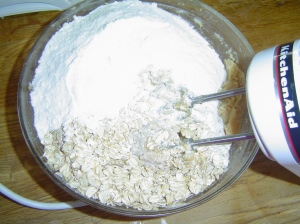
mix in dry ingredients

Fold in chocolate chips by hand

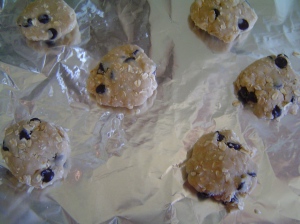
Press dough between the palms of you hands to form cookie shape (makes about 2 dozen cookies).

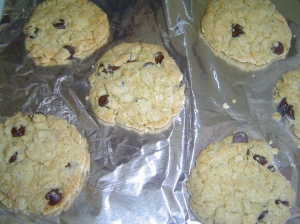
Bake @ 350 for 10 – 12 minutes

Allow to cool completely before removing from pan.  These cookies are not for the impatient.  If you don’t wait for them to cool completely they will fall apart.

Leave a comment

Filed under Baking, Gluten Free

Milking a Goat

Until a few weeks ago I had never milked a goat.  A few days before bringing my goats home I called a woman I know who raises LaManchas and Alpines and asked if she could teach me.  She gave me a quick lesson on one of her easiest milkers, as well as some tips for getting started.  I thought I would take the time to share what I have learned with anyone out there that might be considering raising goats for milk.

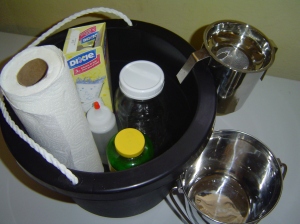
Equipment

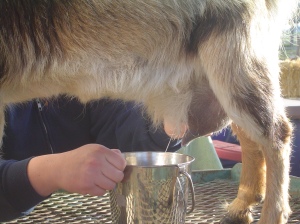
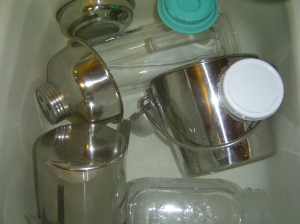
A seamless stainless steel milking pail(I couldn’t find one small enough to fit under my dwarf goat and ended up ordering a two quart food/water pail from a dog supply company)

Strip cup

Towels or paper towels

Teat wash

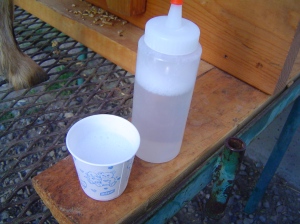
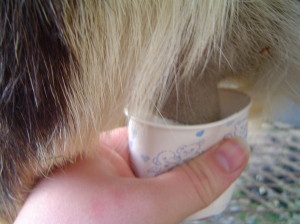
Teat dip cup (I use dixie cups but a shot glass would work too)

Milk tote or jar to hold milk

A treat (I give my goat a vitamin C tablet and she loves it).

Milking

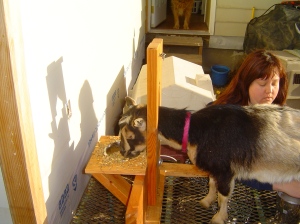
My husband built me a milking stanchion to make milking easier.

Mocha jumps right up onto the milking stand and sticks her head in the stanchion to get her grain.  I can then close and latch the stanchion and she is unable to get her head out.

I begin by dipping her teats in teat wash and wiping her udder clean with a paper towel soaked in the wash.  I use the formula recommended by Molly at Fias Co Farm.

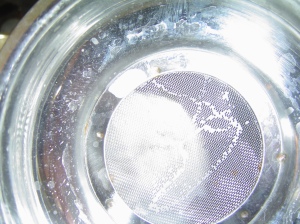
I then squirt a few streams of milk into the strip cup to check for signs of mastitis (any lumps, flakes, or stings in the milk could indicate mastitis, then the milk can be tested with a mastitis test strip) .

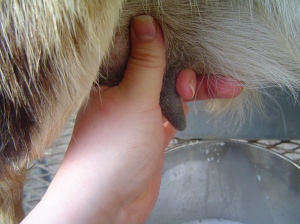
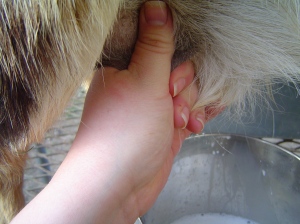
Nigerian goats are a dwarf breed and they have rather small teats.  Because of this I get my thumb all the way up on the udder, then I pinch the top of the teat between my thumb and forefinger.

Then I press down with my middle and ring fingers to push the milk out of the teat

The first few times I milked Mocha she managed to kick the pail and spill half of the milk.  After a few tears I got smart and started taking a jar out with me to pour off the milk.  About two thirds of the way through milking Mocha tends to get a bit a kicky.  I personally think she is willing to share her milk up to a point, and then she wants to reserve the rest for her baby.  At this point I pour off the milk from my pail.  Then if she does kick the pail there isn’t enough milk in it to slosh over the sides.  If see seems unsettled I will milk one handed so that I can hold the pail with the other hand.  Mocha gives me between 3-4 cups of milk at her morning milking.  I crate her baby (Chino) at night so that Mocha has plenty of milk in the morning, then I allow them to spend all day together and I do not do an evening milking.  Once Chino is weaned (we will probably wait till 16 weeks), Mocha should give a little more than one and a half quarts of milk a day.  Not bad for a 65 pound goat.

Once I am finished milking I once again dip Mocha’s teats and allow them to air dry.  Then I give Mocha her treat to reward her for sharing her milk.

Milk Care and Handling

I use all stainless steel and glass equipment for milk handling and storage because it can be easily sanitized.  Before beginning milking I sanitize all of my equipment in a sink full of hot water with a quarter cup of bleach.  I have never been a big fan of bleach, but in this instance I feel that it is the safest, most practical option.  I let the items soak for 2 minutes then air dry for 15 minutes.

Before I head out to milk I place the jar I will be using to store the milk and the milk strainer in the freezer.  When I head in from milking the first thing that I do is pour the milk in to the strainer and place it directly into the fridge.  I do not pasteurize my milk so it is extremely important to chill the milk to 35 degrees as quickly as possible, and then to keep the milk between 35 and 38 degrees( no leaving raw milk out on the counter during dinner).  The milk should last for a week.  We use all of our milk within 48 hours so I haven’t actually found out first hand how long it takes to begin to turn sour.

I then wash all of my equipment in warm soapy water and store for the next milking.  I label and date the milk so that the oldest milk always gets used first.  The milk currently in use is placed in a glass pitcher.

Most of the milk that I get from Mocha is for my eleven month old daughter, who is thriving on it.  Any left over I use for making yogurt.  Eventually I plan to breed Mocha and build a small herd of milk goats.  I figure three goats would provide my family of four with milk for drinking as well as some cheese and yogurt.   My husband was a bit skeptical about this plan until he tasted the milk.  It is wonderful!

These goats have been such a pleasure to own.  In less then three weeks they have become a part of our family.  Mocha follows me around like a puppy while I do my chores.  It is so much fun to see my two year old play with Chino.  They chase each other around the pasture, the backyard, and sometimes through the house.  I am looking forward to sharing my goat stories for years to come.

1 Comment

Filed under Goats